Lemon cake to comfort us

Hellooooo.

I have cake!

And some news. But I will totally understand if you skip the news and scroll right down to the cake recipe.

The travel startup I started with Priya, a while back is in its final stages of conception. We’ve named it Altertrips.

You know, after the words “alternate” and “trips”. Get it?! Ha ha, LOL.

cake_1

After 12 years of being an aspiring nomad, of changing jobs and countries and continents and holidays, certain acute aspects of the travel industry has started to bother me. And we’re looking to address that problem.

As we’re inching towards the launch – December, yikes – my palms are getting sweatier, my fingertips are bloody with all the nail biting, I’m hoarse after continuously yelling at my co-founder and my tech guys (I’m quite sure they’re ready to strangle me by now, but that will be a battle for another day).

I will talk to you about it soon, in another blog post.

Let’s just say for now, that it has been lesson after lesson, on life and on overcoming obstacles. We’ve been deeply humbled, overwhelmed, excited, triumphant, confused and angry at times. Sometimes all of that at the same time. And the intensity strengthens as we near, what we will call from now on, LAUNCH DATE.

But until then, we have lemon cake to comfort us.

Continue reading Lemon cake to comfort us

the boule wears butter

Hooo boy. Here we go.

I think at this point it would be useless to look at the thermometer. Because I’m pretty sure the mercury’s exploded out the top. It’s that hot here. We’d be kidding ourselves if we call this “spring”. It’s more like we’re bang in the middle of summer sweating bullets. That time of year when picnic baskets are whipped out, a bottle of Pimm’s is more dear to you than your brother or sister and you’re glad you installed air-conditioning in the den last year.

After all the bellyaching about being a dabbler, I’m back with a vengeance. A.k.a. boule à l’ail.

Well. Sort of. Because I didn’t really look up a French technique or recipe for this one. Nor did I stuff it with garlic in any way. And there is nothing terribly ground-breaking about making bread at home. But I did it. I baked bread. And it is nothing less than liberating. A feeling of utter independence. I am told that making a bottle of jam or brewing a vat of beer can harvest a similar feeling, apparently. We’ll get there. For now let’s just deal with bread.

Those of you who already have bucketloads of bread-making savvy and already know the feeling I’m talking about – keep mum, will you? Let me have my five minutes of glory and enlightenment.

The boule in question is definitely not the first of its kind. I did have half-a mind to start by making a sourdough starter. I also at one point thought of bounding down to my local bakery to ask for a jar of starter, but then they might have looked at me weird, so that idea went out the window. And after going through a plethora of recipes thrown at me by countless bakers – Julia Child warbled at me with kind eyes, Michael Ruhlmann gave me a lopsided smile from the pages of his book and there was also a lesson from Jeff Hertzberg and Zoë François – I settled on quantities that were pretty consistent through all the recipes. And what we’re left with is some really good bread, speckled with generous amounts of thyme and parsley and fragrant with garlic. The boule wears butter like second skin and is gorgeous when used to sop up meaty stews or soups.

I love that word ‘sop’. Sop. I’m eating a piece as I’m typing this and I promise you, you’re going to like this. Maybe you already do.

Boule à l’ail

Note about mixing and kneading:

If you’re using a stand/electric mixer with kneading attachment: Mix the ingredients together till the dough comes off the kneading needles easily, slightly elastic and in one piece. If the dough is too sticky keep adding flour little by little till it reaches the correct consistency. Take it out of the bowl and knead vigorously for 5 minutes by hand, over a lightly floured surface.

If you’re doing this by hand: Start mixing with a fork. As soon as the mixture starts clumping around the twines of the fork, scoop it out on a clean well-floured surface and bring it together. Start kneading vigorously and continue kneading for 10-15 minutes. While kneading, press hard with the heel of your palm. If the dough sticks to your palm, sprinkle a little more flour onto the dough. Keep adding flour little by little till the dough is soft but not sticky. When you press it there should be a thumbprint left behind.

For the first boule, I used half the quantities noted below and that’s how big it turned out. I also pulled the boule out of the oven before it browned any further. So if you like a darker crust on your bread keep it in the oven longer. The second boule [made using exact quantities noted below] is in my oven right now. Will let you know how it turns out.

1 cup water
1 tsp fresh yeast
Pinch of granulated sugar
2 cups bread flour + more, as needed
1 tsp salt
1 tbsp dried thyme
1 tbsp dried parsley
1 tsp garlic paste, for brushing
Ghee or olive oil, for brushing
1 tbsp cracked black pepper/ Chopped garlic, to stud on top [optional]

In a glass bowl, microwave the water on full power for 15 seconds or till its warm to the touch. It shouldn’t be hot or steaming and you should be able to plunge a finger into it easily. Add the yeast and sugar an d stir to dissolve. Leave the bowl in a warm but dry place for 10-15 minutes. The surface should be frothy. In a large bowl sift in the flour, salt, thyme and parsley and mix with a fork. Make a well in the centre and pour in the yeasty water. Mix and knead as required (see head note).

Pop the dough into a large clean bowl and cover with cling film. Let this bowl rest in a warm and dry place for 1 hour, or till the mass doubles in size. Take it out of the bowl and knead vigorously again for about 5 minutes to knock the air out. Shape into a round ball and place on a lightly greased baking tray. A baking tray lined with parchment will also do. Brush the surface of the dough with ghee or olive oil. Rest for another hour till the dough swells up again.

Pre-heat oven to 200 °C. Brush the surface again with some more ghee/oil. Brush with garlic as well. Slash the surface once or twice with a sharp knife. This helps the dough release hot air and rise. Sprinkle cracked black pepper on top and bake at 200 °C for 10 minutes. Lower the temperature to 180 °C and bake for 25-35 minutes till the top is golden-brown and the bread produces a hollow sound when the bottom is tapped.

Serve slathered generously with butter. Best when dipped in extra-virgin olive oil or with soupy meat stews.


no easter nor’ westers. just boiled pastry

You guys sure know a good thing when you see one. And thank God for that because I have more.

I’m in Kolkata visiting my folks and the last time I checked, the bloody Nor’westers had blown us off our easy chairs.

We spent all of yesterday’s evening running around the flat, stuffing the sills of windows and bottoms of doors with old tablecloths, so the thunderstorm wouldn’t slip in. And last Friday at about 6 in the morning a persistent and unholy sounding wailing woke me up. It was the wind gushing through the slits of our aluminum window frames. I sat up on my bed to find the city swaying and thrashing about in the angriest storm I’ve seen in a long time. It then proceeded to scare away the sun, who stayed hidden for a further two hours. Wimp.

But it is hard to complain about thunder and storms when you’re one of those who actually gets all excited and tingly at the appearance of dark clouds. In the moments of a boring single life that revolves around reinforced cement concrete, wolfing down leftover potato salad at the sink and trying to make rent, the deep rumbling of a thunderstorm can induce the same kind of excitement that is associated with the anticipation of a first kiss.

Although London hasn’t really disappointed me over the years with her constant supply of dark clouds – she still has a lot to learn from Kolkata when it comes down to a proper at-Nature’s-mercy thunderstorm. And this year, the Nor’westers collided with Easter weekend.

Honestly, we’re not big on Easter. The rest of London is obviously very pro-Easter. But as far as celebrations go, over here they are as follows:

– we absolutely love Christmas. No. I mean, love it.

– we spend a lot of money on Boxing Day.

– we sleep till late and watch the telly on the Queen’s birthday.

– we devote an entire day to alcohol. Its called St Patty’s Day.

– we are close to indifferent about the Fourth of July.

– we know absolutely nothing about Thanksgiving.

– we would very much like to get to know Halloween, but haven’t actually had a chance so far.

– New Year’s Eve is another excuse for us to eat.

And then comes Easter. Our Easter celebrations were half-hearted at best when I was growing up in India and nothing has changed much. As kids we’d wake up early on the holiday, jump around because school’s off, pop a couple of Creme Eggs into our mouths and then end the day with lots of curry.

But you can’t really blame us. As Indians, and mostly Hindus, we have to get through celebrating more than 108 Gods and Goddesses before we can actually get anywhere close to anything to do with the last name Christ, on the annual list. And by the time we get to Jesus, we’re already exhausted and stuffed till here with food.

However, if you’re anything like us, you always have a little room left over for a little more food.

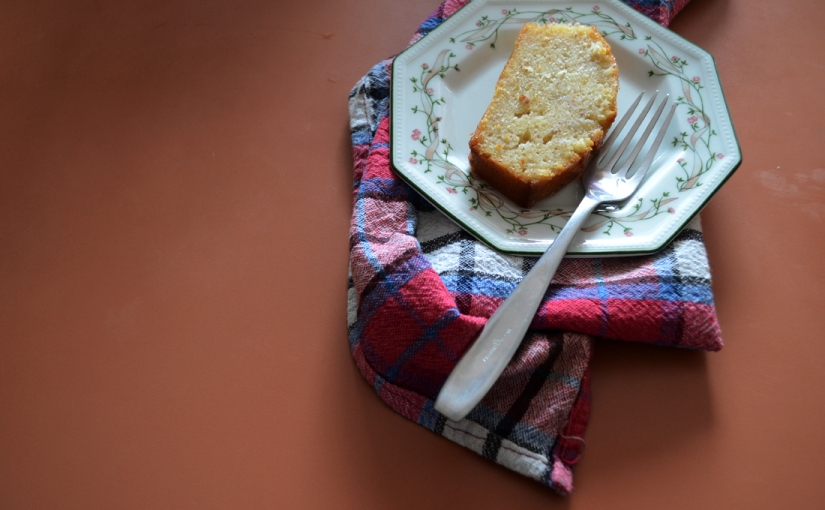
Especially if that food is a tart. A dessert tart. A coconut custard dessert tart. With chocolate. You can’t go wrong with this.

With all the coconut macarons that were flying through the air all throughout Easter, this tart does well when it comes to “sticking to the theme”. But I want to talk to you more about the short crust pastry than the custard filling. Because the pastry starts with boiling butter. You heard me. Boiling butter.

I haven’t had as much experience with tart shells as I’ve had with cakes and candy. I blame the idea of a “foolproof pastry recipe” that most recipes authors throw up. That idea is ridiculous. If its fool-proof then why, dear Sir/Madam, am I scraping it off my tart tin instead of cutting it? No wonder I’ve given up on homemade puff pastry.

Recipe authors need to realize that sometimes they have to deal with blatantly disobedient people like me who never get things right the first time around. But this tart dough à la française is something else. It comes from David Lebovitz and belongs to Promenades Gourmandes’ Paule Caillat. It’s not your typical rub-chilled-butter-nubbins-into-flour kind of dough recipe. It begins with browning butter in the oven, followed by dumping a sizeable amount of flour into the hot butter. The dough is then spread and patted onto a tart tin and blind baked without weight – no battling with rolling pins, cling film or dried beans. And best of all, no chill-time-in-the-refrigerator to wait around for. The result is a crisp and flaky pastry with a distinct butter taste [oh well, obviously] that is a far cry from temperamental and fussy, soggy and fall-apart versions that I’ve had to put up with in the past. And all that makes it – in my book – a keeper.

I am obviously no Jackson Pollock.

Coconut custard on pâte sucrée a la française
from Paule Caillat via David Lebovitz

NOTE: The custard has a base of coconut milk instead of cream or whole milk, which puts the exclamation mark after coconut[!]. And although the tart tastes good just by itself, adding a bit of chocolate in the end really helps. I made two versions of this tart – for the first one, I melted dark chocolate in the microwave and randomly splashed it over the baked tart, after it had cooled [in the photograph]. For the second one, I toasted some dessicated coconut [or freshly grated coconut] in a non-stick pan till they browned at the edges, and then sprinkled them over the filling before baking the tart. This results in a nicely caramelized – or macarooned – finish.

For the pastry:
90gm (3 oz) unsalted butter, cut into pieces
1 tbsp vegetable oil (eg, sunflower, canola, peanut etc)
3 tbsp water
1 tbsp sugar
1/8 tsp salt
1 cup (125 gm) all-purpose flour

Pre-heat the oven to 210º C. Combine butter, oil, water, sugar and salt in a medium-sized oven-proof bowl. Place the bowl in the oven for 15 minutes, until the butter starts bubbling and the edges start to just brown. Remove the bowl from oven (be careful, the bowl will be hot and the mixture might sputter a bit), dump the flour into the butter and stir it in quickly, until it comes together and forms a ball which pulls away from the sides of the bowl. Transfer the dough to a 8-9 inch tart tin with a removable bottom and spread it a bit with a spatula. Once the dough is cool enough to handle, keep a small piece of dough – about the size of a raspberry – aside and pat the rest into the tin with the heel of your hand. Use your fingers to press it up the sides of the tin. You could pinch the edges against the tart tin with a fork if you want. Prick the dough all over with a fork and bake the shell for about 15 minutes, or until the dough is golden brown. Remove from the oven and if there are any sizeable cracks, use the bits of reserved dough that you had kept aside, to fill in and patch them. The shell need to be cooled before filling.

For the filling:
1 1/3 cups (400ml) of coconut milk
3/4 cup of granulated sugar
1 dried bay leaf
1/4 tsp grated nutmeg
2 eggs
2/3 cup of freshly grated coconut
1/2 cup of dessicated coconut, toasted (optional – see head note)
Dark chocolate, to garnish (optional)

Pre-heat oven to 180º C. In a saucepan combine coconut milk, sugar, bay leaf and nutmeg on high heat. Stir to dissolve the sugar. In a large bowl, whisk the two eggs. As soon as the coconut milk mixture starts to bubble up take the saucepan off the heat and pour its contents into the eggs slowly, while whisking continuously so that the eggs do not scramble. Pour the mixture back into the saucepan and let it simmer on low heat, stirring constantly with a wooden spoon for about 5-8 minutes, till the custard coats the back of the spoon. Strain the custard back into the bowl that initially had the eggs in it and stir in the freshly grated coconut. Let the mixture cool completely before filling the tart shell. If you opt for toasted dessicated coconut (see head note), then sprinkle these over the unbaked tart now. Bake for 30-40 minutes till the centre is slightly wobbly but looks just set. Cool tart in its tin completely. To garnish, spoon melted dark chocolate on top. Serve thick wedges with lightly whipped cream or all by themselves.

looking for confidence

I should probably rename the post title to “Chocolate cake for unemployed singles”.

I get compulsive and impulsive and all sorts of other ‘-ulsives’ when I’m bored or disappointed. And most of the time the solution to all that, involves food. If you need evidence, you need only to look at my ever-increasingly wobbly backside.

And boring has been happening a lot lately. Since I left my last job, I’ve had a whole week’s worth of free-time on my hands. And guess what. I’ve been going around town visiting all the specialty food shops I can find – an activity which had only been dream until last week. Usually, my daily routine includes a visit to Waitrose on my way home from office and a tour of the Selfridges Food Hall on the weekends. Don’t you dare look down on me because I visit “food halls”….Selfridges has an Italian  porchetta collection to die for.

But I digress. I’m not here to talk about porchetta, I’m here to talk about the 300gm-bar of Valhrona 70% that I bought from the chocolate section. It features in my Gâteau Au Chocolat. Now it has been ages since I’ve baked. Not since, I packed up my kitchen and left for a three-month tour of India. So when one of my housemates left a wire whisk on the kitchen counter, the temptation was too much to resist. However, I realized that I’d almost lost the confidence to bake. It’s not really like riding a bicycle…or a bicyclist *wink*. I’ve lost the patience to measure the ingredients, the strength to whisk the whites, the rules to remember while melting chocolate and I’ve forgotten to not be afraid of folding egg whites into batter. Whisked egg whites can smell fear.

And that’s why the the cake turned out flatter than normal, and downright soggy than lusciously moist. It was like the cake was ratting me out to be a novice baker!

The chocolate however, did not disappoint. The only irony is, the recipe comes from Green & Black’s.

Claudia Roden’s Gâteau Au Chocolat
 from Ultimate Chocolate Collection

250gm dark chocolate (70% at least, please)
100gm unslated butter, plus extra for greasing
6 large eggs, separated
75gm caster sugar
100gms ground almonds
Flour for dusting

Pre-heat the oven to 180 deg C. Grease a baking tin and dust lightly with flour to prep it. Melt chocolate and butter on a double-boiler (or microwave) and cool for a couple of minutes. Meanwhile beat the egg yolks with sugar until light and fluffy. Add the eggs and almond flour to the chocolate mixture and mix well. Beat the egg whites till stiff and fold the mass into the chocolate mixture, gently but with confidence! Pour into the tin and bake for 20-30 minutes (depending on how your oven heats up) or till a skewer inserted in the middle comes out slightly greasy. The cake does not rise much and the middle should still be a little under-baked when you take it out to cool. Cool. Cut up in slices and serve with lightly whipped cream, berries, or nothing at all.